Un Tee-Shirt pour Maman

The pitfalls of buying remnant fabric is that you may not enough to complete your project. My t-shirt based on McCall’s 6754 went from 17″ long down to 15″ and from a 3/4 sleeve to a cap sleeve just so that I could fit the pattern onto the fabric.

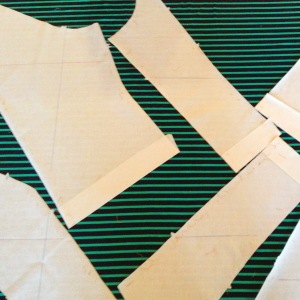
Muslin placed on knit fabric - just enough space

Muslin placed on knit fabric – just enough space

I practiced on  cotton muslin but now that I have sewn together the T-shirt it is too big (cotton obviously doesn’t stretch like knit). I will have to adjust the seems some more before it is wearable.

McCall's M6754

McCall’s M6754

Overall I love how it turned out and can’t wait to wear it soon.

Commencement de Livre en Tissue

I have been wracking my brain on which of my remnant fabrics to use for X’s fabric book. At the end I decided to take apart his playmat from Ikea (Leka Cirkus, now discontinued). He no longer uses it and it’s in the way.

X with a milk beard on Leka Cirkus

X with a milk beard on the Leka Cirkus

I will remove the backing and use it to make an organizer and a windbreaker for our newly purchased Nano Mountain buggy stroller.

Back of Leka Cirkus

Back of Leka Cirkus

The front I will cut into 6 rectangular pieces (avoiding the circus animals) to make the pages and then use a combination of the animals and other remnant fabric that I have to make the appliques.

Full view of Leka Cirkus

Full view of Leka Cirkus

Une Chemise pour Maman

I ran out of buttons; I’ll have to pick up a couple more but I have finished my tunic top and very happy with the result. I had a couple of gaffes. Cutting the back collar too short and making the buttonholes on the sleeves to far in but I can live with those mistakes.

Vogue 1323 top made in 100% Rayon

Vogue 1323 top made in 100% Rayon

I made the size 16. I added 1.5″ to the front to allow for my larger bust, shortened the sleeves to 3/4 length, lengthened the bodice by 3 ” and omitted the front pockets.

Also the first time I used the automatic buttonhole and I am in awe. I was hesitant in adding buttonhole and even considered adding snaps instead but the results are amazing and not at all difficult to replicate.

Pas Raisonnable

Okay…maybe completing a project each week is too much. X is teething, pulling himself up to stand, finally signing and needing constant attention these last few weeks. I have been able to print out clip art for the fabric book I intend to make for our first real vacation together.

Clip art for fabric book

Clip art for fabric book

…and I have ordered the fabric for his roadmap quilt. In the meantime I am working on a shirt for myself (Vogue pattern 1323). The last time I sewed myself a garment was back in high school. A pair of pants, which I never wore  a sorry attempt to make my prom dress. I had high expectations. I was trying to use my mother’s Pfaff from the 80’s meant to be used at 220V connected to a transformer for 110V. I am much older and a little wiser now and I have made my first attempt of the shirt on muslin. So far so good.

Muslin trial of Vogue 1323

Muslin trial of Vogue 1323

The finished product will be made with remnant fabric that I bought last month.

100% rayon - remnant fabric

100% rayon – remnant fabric


Le Raccommodage

While waiting for my bias tape maker to arrive I decided to mend a few of X’s clothes. My first time using a twin needle. Took me a couple of tries to figure out how to thread the second spool and the machine skipped stitches a few times. Changing the tensions and going slowly did the trick. It would have gone better if I used a twin stretch instead of twin universal but I do not have one on hand.

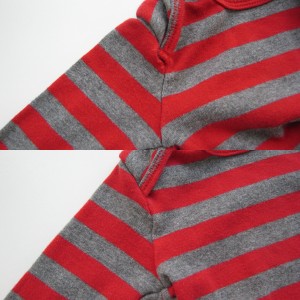
Below is a before and after picture. Do not ask me what the stain is on the sleeve. I did my best to remove it, but it is permanent. X still fits the onesie and will continue to for the next few months at least. It seamed a waste to discard it.

Long sleeve to short with a twin needle

Long sleeve to short with a twin needle

I also fixed another onesie that was coming apart at the seams using a single needle with a stretch stitch.

Recently Updated1

Single needle with stretch stitch repair


En Action

The nylon sleeved bib is by far better than the previous version in laminated cotton. My main concern was X would find the sound of the nylon (swishing and sizzling) to distracting while eating. He did like rubbing yogurt on his belly but only after he was finished with his meal.

Bib in action

Bib in action

It was simpler to wash and so far seems to by drying quickly. Just in time for lunch.

La Bavette

Took a break on Sunday, mostly because we weren’t home. The reality is I wont be able to keep making an item or two each day. It is not feasible considering that I also have to take care of X, clean and cook and continue my relationship with my husband.

However I am still on a high from my new machine and want keep trying out challenging (for me at least) projects. Today I made nylon sleeved bibs. I used a ballpoint 90/14 needle for the seams on the nylon and switched back to 80/12 universal when sewing the bias tape.

I already made a pair on my old XR-31 with laminated cotton. Unfortunately I had no more laminated cotton left and I found that the cotton backing took to long to dry and I could only use the bib once a day. I think the nylon will do a better job in daily reuse. Here is the finished product.

Wipedown sleeved bib

Wipe-down sleeved bib

I cut two bibs but was only able to make one. I ran out of bias tape. I ordered a bias tape maker this morning and should have it by Wednesday. So all things considered I should be able to finish the second bib on Friday.

Des Bottes et des Chaussures

After making that dapper hat, I had to follow-up with a pair of matching shoes. Thanks again to a pattern from Etsy. It took two takes. The first pair was way to big for X’s feet. I couldn’t be bothered to measure his foot and decided to pick the pattern size from his age. I should know better. X is small for his age and opening of the shoes were as big as his feet. The second pair turned out perfectly. The pattern calls for some hand stitching, which I don’t generally mind but the back of the needle pierce through skin on several stitches as I was trying to push it through the leather sole. I also made a new pair of boots to follow the first pair which have now become too small. Lessons learned:

  1. Measure twice, cut once
  2. Wear a band-aid prior to hand sewing tough material.
    Up-sized boots

    Up-sized boots

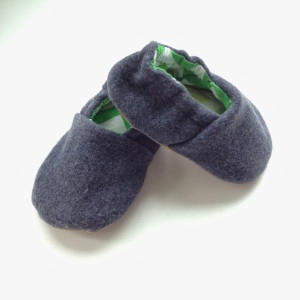
    Little man shoes

    Little man shoes

Le Chapeau

I have put my new (BIG GRIN) heavy-duty machine to the test. After only having the machine for a couple of hours I have finished my first project; a little man hat for X. The pattern I purchased from Etsy and I cut all the pieces prior to receiving my machine. I am quite proud of the final product. It looks like it was made by a professional. I was able to sew the brim with Pellon Ultrafirm interface, wool felt exterior and cotton interior with no alterations to the machine or the thread tension. I am impressed. Even better, X doesn’t mind having it on his noggin.

Little man hat

Little man hat

Ma Nouvelle Machine à Coudre

I was an occasional sewer. Sewing when necessity dictated. Hemming pants, shortening curtains, mending zippers. Over 10 years ago I bought a Brother XR-31. A simple mechanical machine with 12 stitches. It didn’t do jeans and thick folds of fabric, but it served its purpose. That is until last year when the blind hem stitch would not displace the needle to the proper position. Not being able to blind stitch in essence prevented me from quickly mending hems. Since then I have been thinking about buying a new machine.

Recently I heard a rattle inside and decided to open it up. It wasn’t like I was going to void my warranty. The plastic housing around the power cord had disintegrated. There were small shards of plastic inside the machine and live wires exposed. It was time for a change.

In trying to be eco-friendly I decided to have my machine repaired. However it would to cost more to service than the original cost of the machine and considering that I didn’t have any stretch stitch options on the machine (other than the zigzag) pushed me further to acquiring a new machine. Where to start? Mechanical, computerized, automatic thread tension, quilting, embroidery, etc. After searching through the interwebs I thought I had found my machine. Another Brother, the Project Runway CE7070PRW. I was ecstatic when it arrived. It had all the features I thought I wanted; drop-in bobbin, automatic threader, computerized, 70 different stitches and more. To be honest I had trouble with it. The easiest materials seemed to catch inside the feed dogs. It would not sew in a straight line compared to my previous machine and the most annoying feature the machine continued to sew and place the needle in the down position even after my foot was off the pedal. I admit that most of the trouble I had with the machine was user error but the needle position adjustment is inherent to this machine and drove me up the wall.

I had the icky feeling that I didn’t make the right choice for my needs. I returned my new machine after only a few days of use and decided on reverting to a mechanical machine. Something more responsive and able to sew heavy fabrics. I bought the Janome HD3000 and I am loving it.

In conclusion, if you can make to a dealer – go, try out the different types of machines. Buy something simple, especially if you are just starting out. Lastly, don’t be afraid to admit that what you thought was the right tool for you isn’t.

My new machine. The Janome HD3000

My new machine. The Janome HD3000